Tahuya Loop

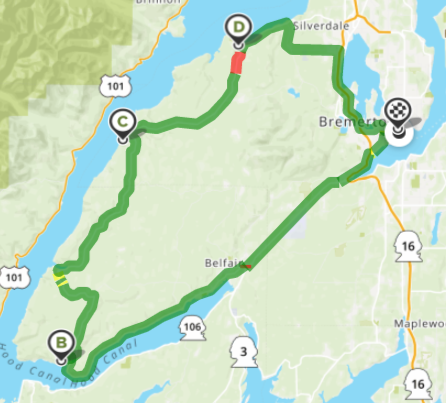
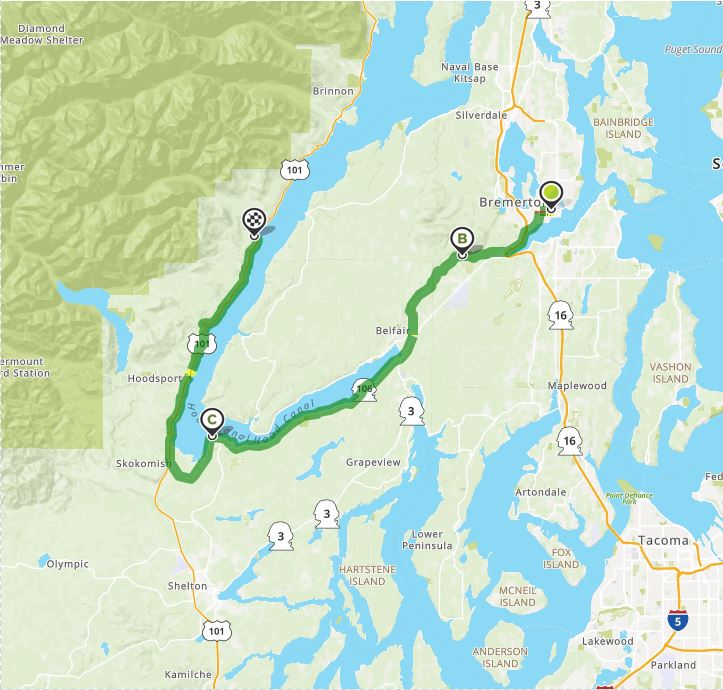
It had been far too long since I had ridden with anyone else. I had been riding a lot, nearly daily but it was all commuting back and forth to work with the odd evening ride to blow off steam. I had been noodling the idea of getting Dan to ride out to Seabeck with me. It was on the back burner as a short ride just to fill a little time when we had a spare hour. Dan and I were discussing possible places to go and he suggested Tahuya. This was going to be perfect, I immediately expanded on that and we settled on a route from Bremerton, to Tahuya, up to Holly, over to Seabeck and back to Bremerton. The GPS told us it would be just a hair under 2 hours and we figured with stops etc. we could easily make it into at least 3 hours. Perfect for an afternoon ride. 

Something we aren’t used to anymore during the Pandemic………. Traffic.

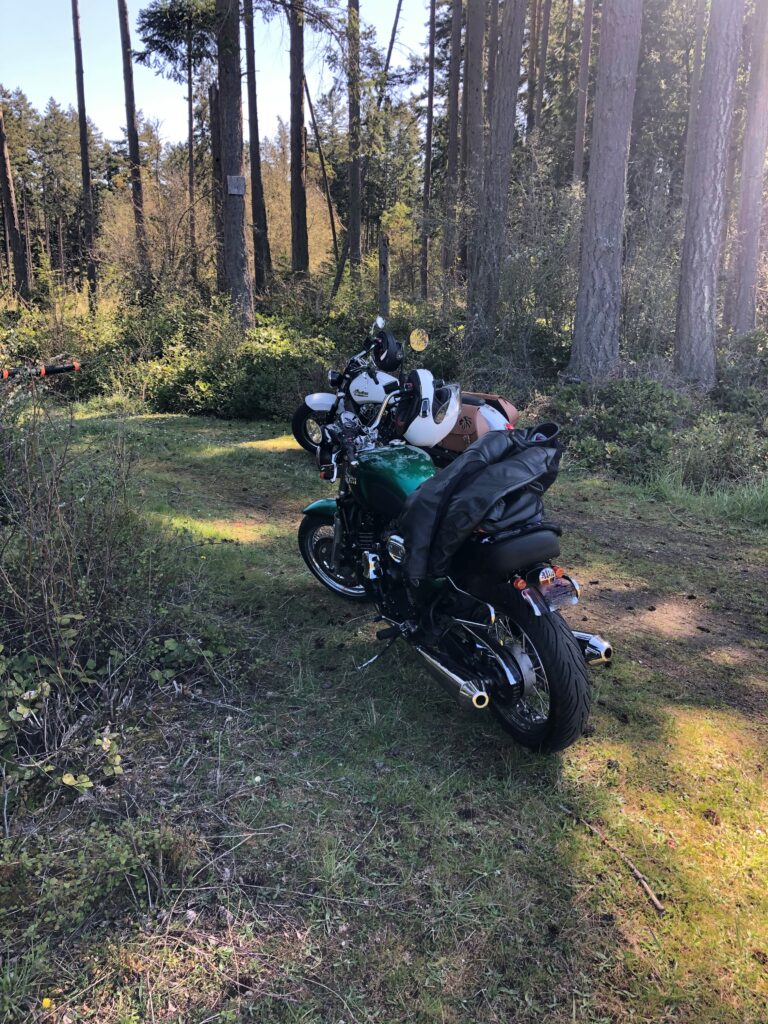
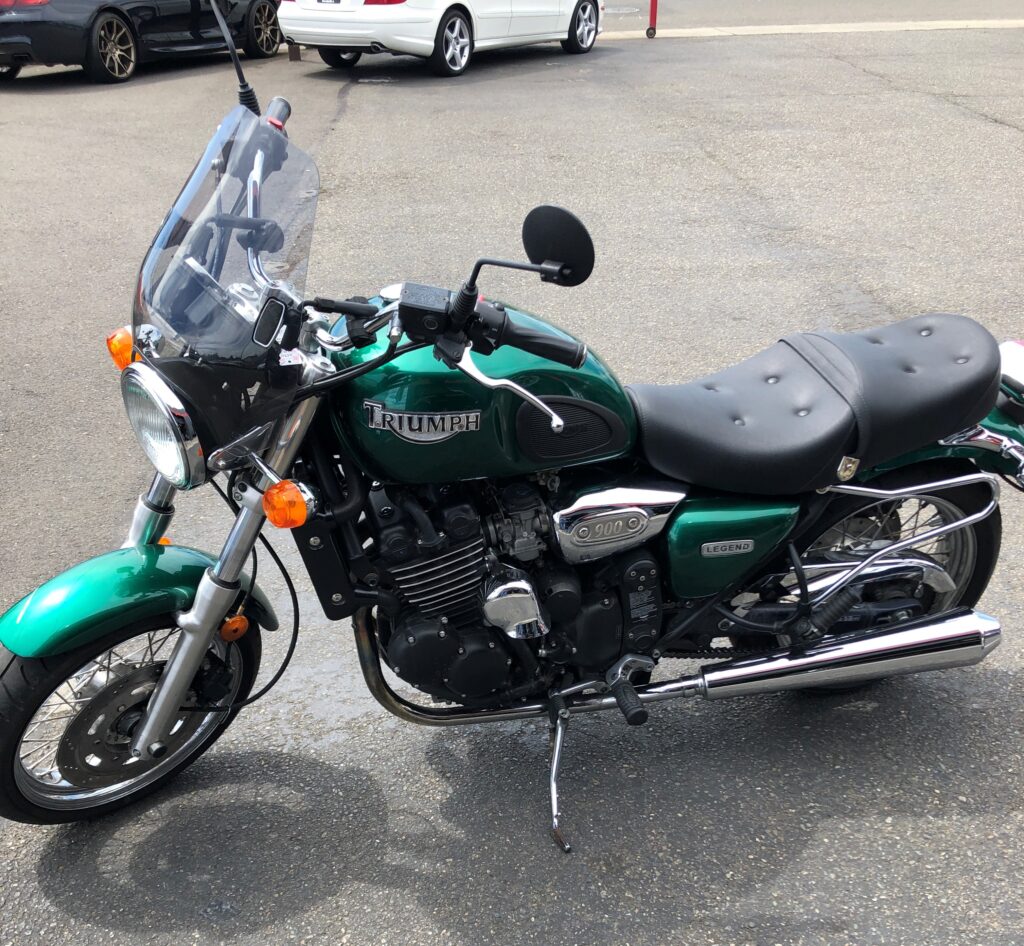
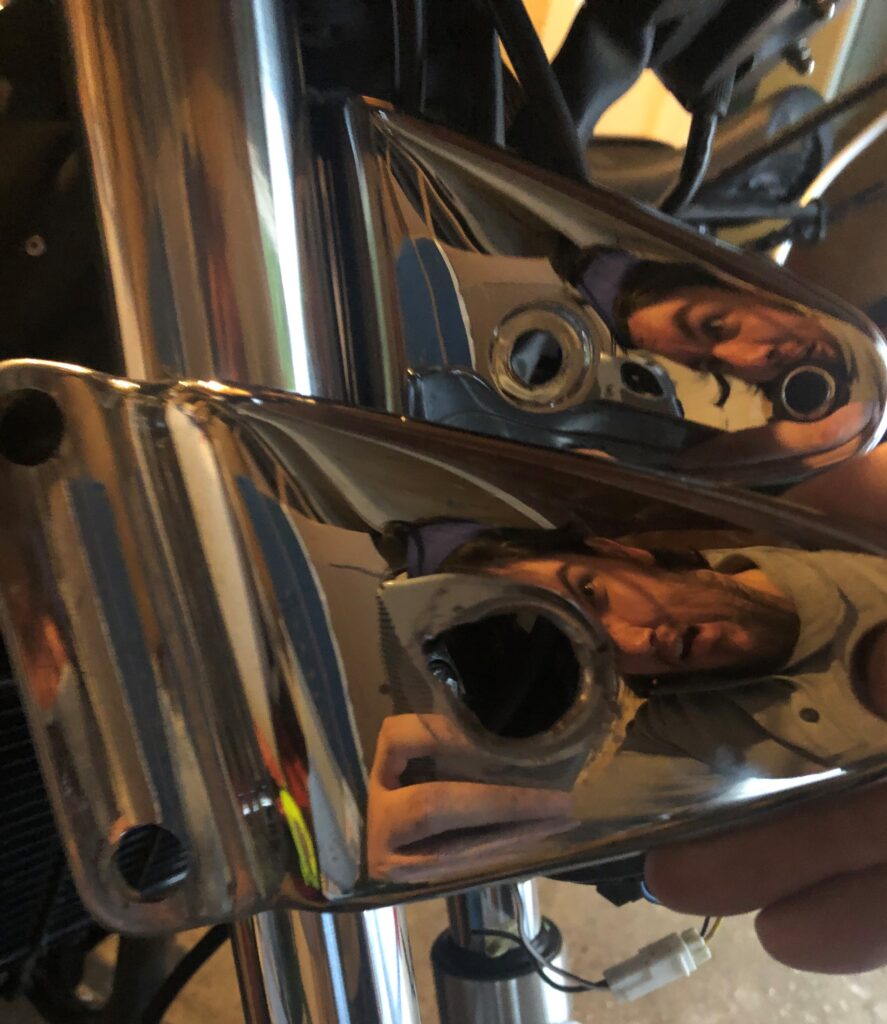
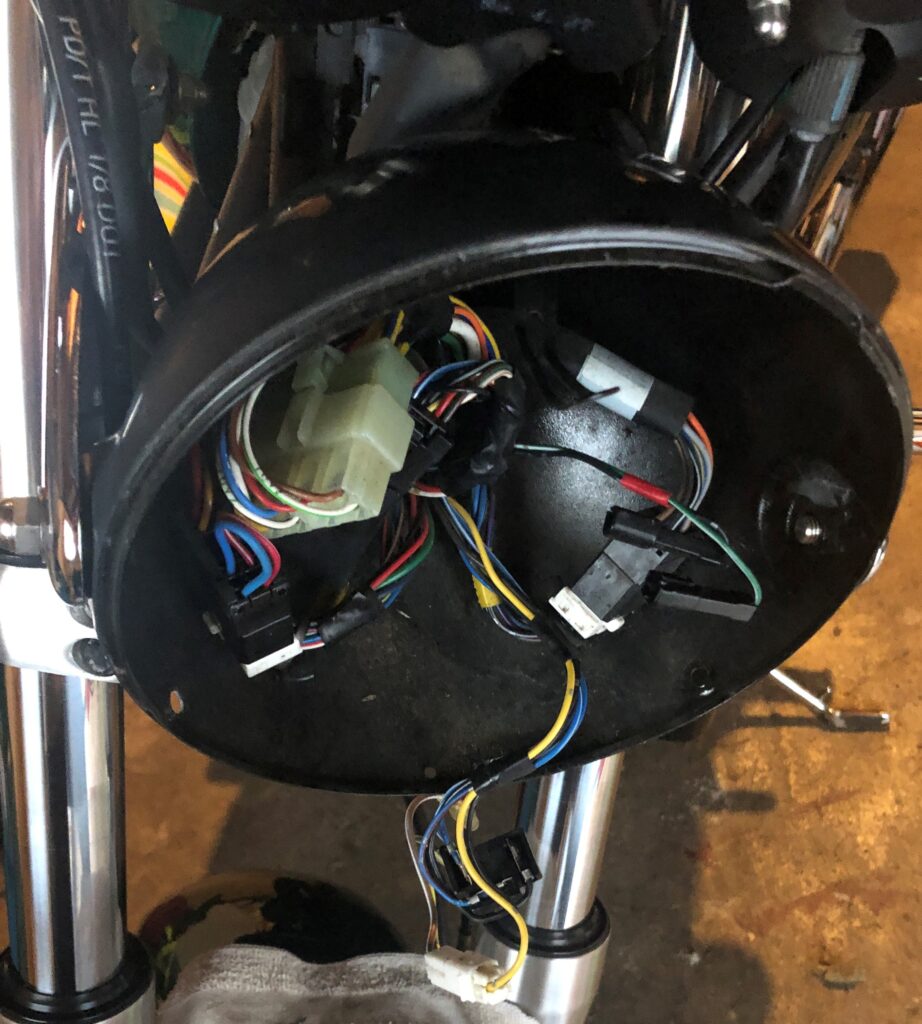
A small side note, at this point in time my bike had been having issues for a couple weeks. Some sort of electrical issue tied in with the starter system. I wasn’t sure if my starter was starting to give up or if there was a short somewhere or another issue I hadn’t thought about but it had gotten to the point where I was crossing my fingers every time I turned the key and hit the button. Dan had wanted to wash his bike and I wanted to throw on my saddlebags to bring along my tools, water etc. By the time Dan was about done with his chore I was ready to warm up my Triumph and boy it was a tough start. The hardest start to date, turn the key, hit the button, click and the dash goes out. Turn the key, push the button and the starter just starts to go and click, the dash goes out. Turn the key, repeat, repeat, repeat…. Finally the Kid comes to life and I blow a sigh of relief for now. I know I have only about 30 miles left in the tank so we can’t get far before I’ll need to stop for gas and that could be an issue, but in previous occasions the first start of the day has been the only real issue and Danger is my middle name. I decided to risk it.

Easy to smile with views like this right?

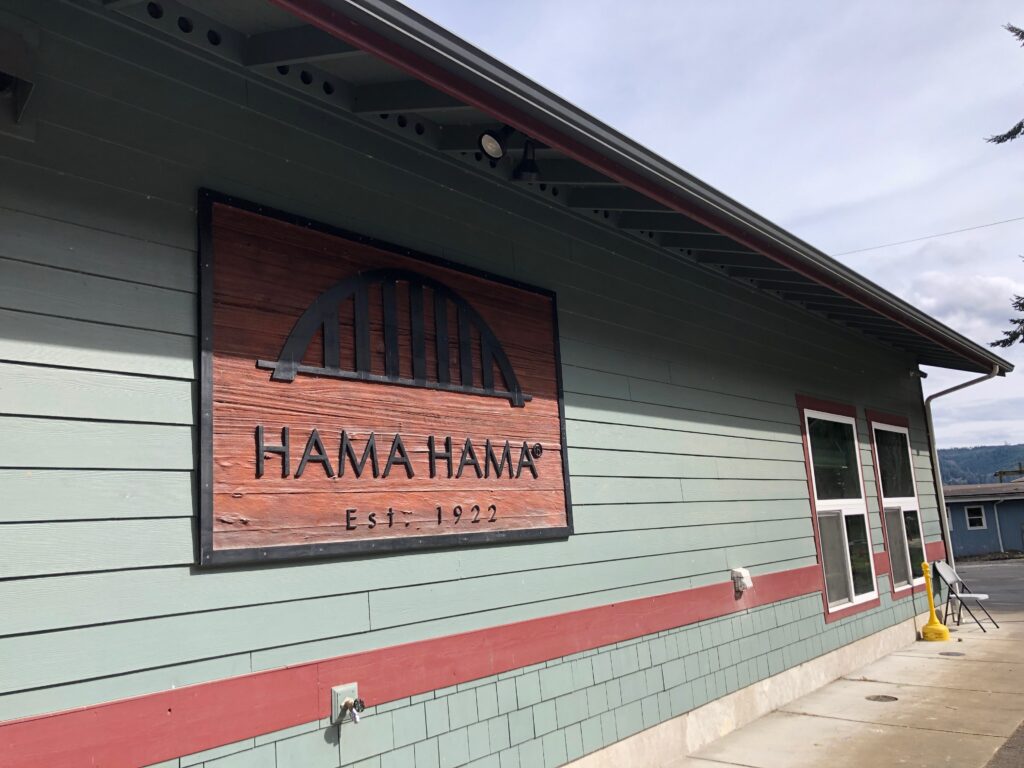
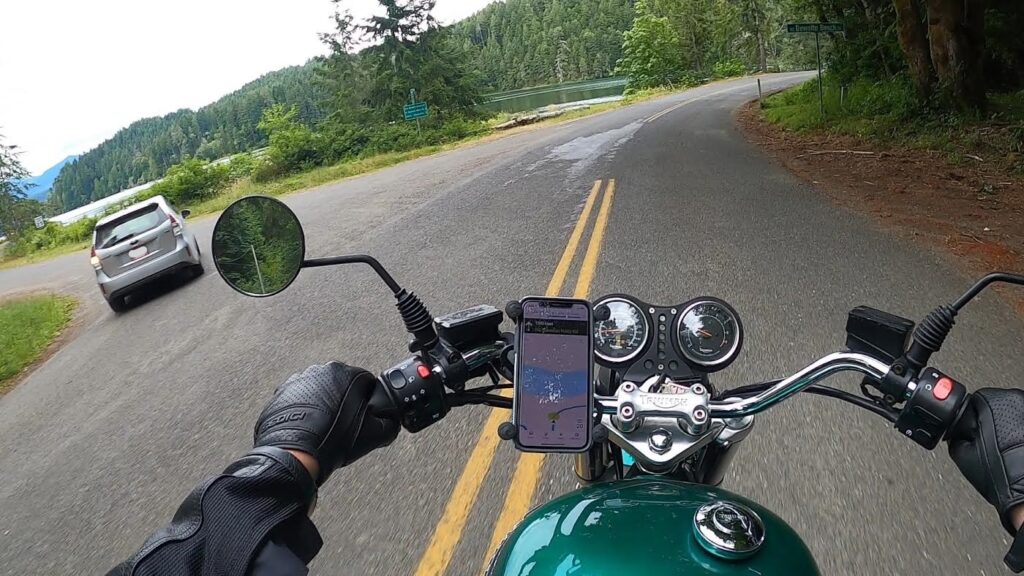
We ran down the 16 to connect with the Old Belfair Highway which I have covered before. It’s pretty much my standard route out of town when I head southwest. When we were just about a mile outside of Belfair we hit traffic. Actual traffic, something I haven’t seen this riding season with Covid and all. About a half hour later we decided that we were going to grab lunch here too since we needed to stop for gas. Food was first which meant shutting off my bike. We ate, we enjoyed it, and then it was time to run across the parking lot to get gas. The bike fired up on the first touch and it was a breath of fresh air. The gas station was more of the same, as if my bike hadn’t had a single issue with starting before. We were really now taking off into our little corner of unknown. The only part of this ride I had previously been on was the trip to Belfair and then part of the road between Seabeck and Holly back to Bremerton so we had planned out a route that was roughly 50% new to me. 

There are worse places to get a little turned around though. Oh no I had to drive by this twice!

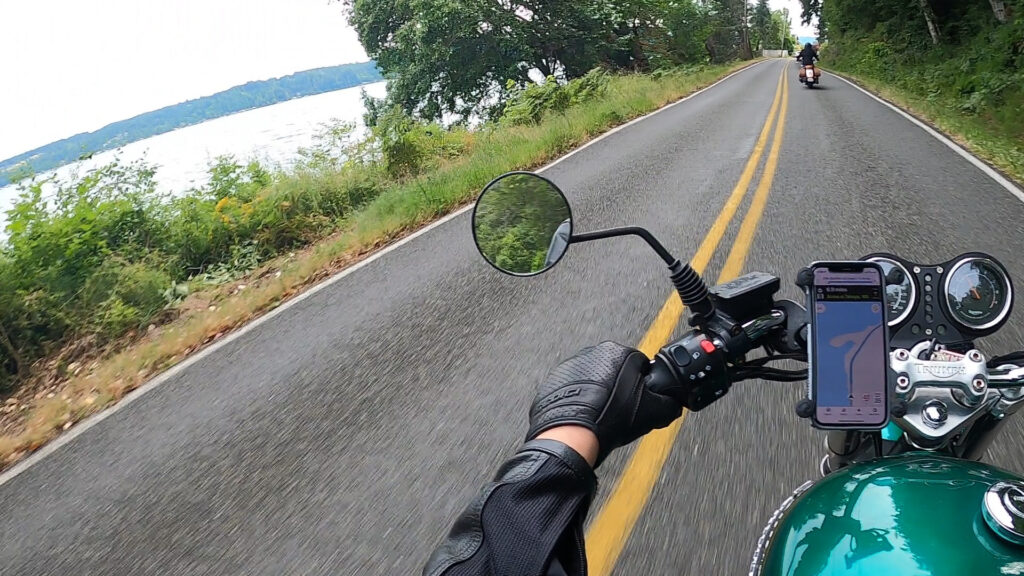
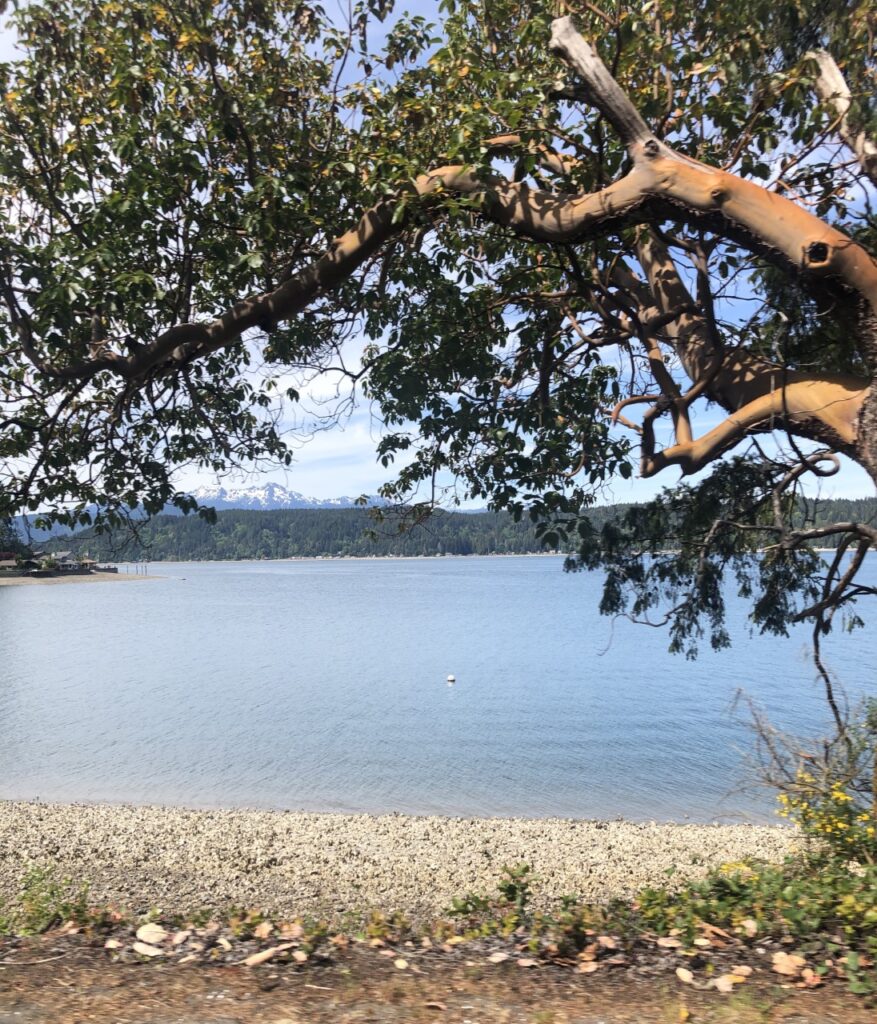
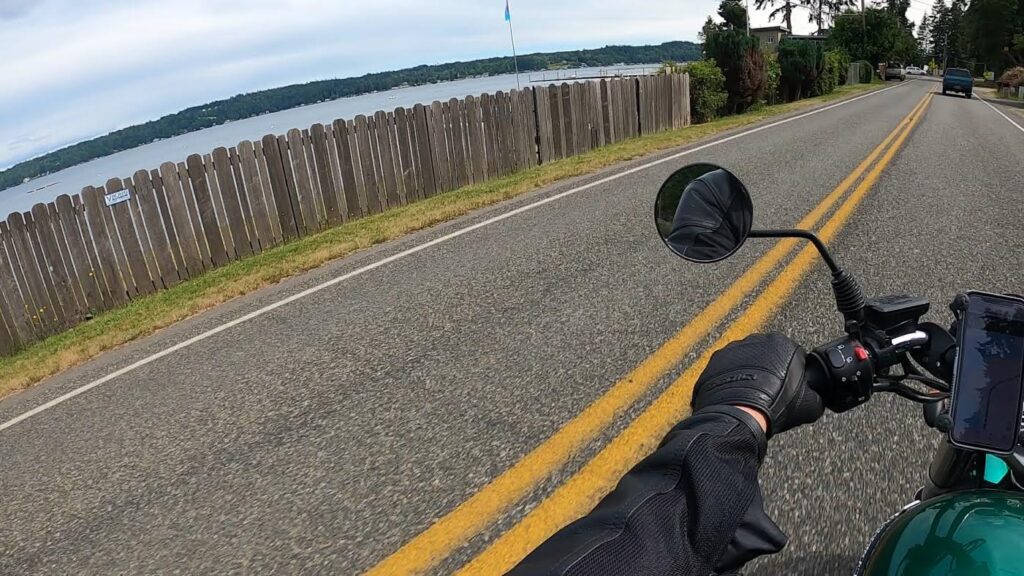
A road gives you a feeling when you first meet. It doesn’t take long for the introductions to be concluded, just a few hundred yards is all and then you get a sense of what you are in store for. Moments after leaving Belfair behind I knew that we were on a good stretch of road. We went through a handful of swooping corners; meanwhile, the traffic in front of us seemed to melt away leaving Dan and I to our expedition. As we carved our way down the road we were treated to little peaks of the Hood Canal, busy with people out and about enjoying the water; aboard boats, kayaks, paddle boards and jet skis. As people pulled off the road to let us by, the sun was shining and the road was twisting; this is what riding in the PNW is all about and it always puts a smile on my face. 

What you can’t quite tell from the picture is how convex this turn was,

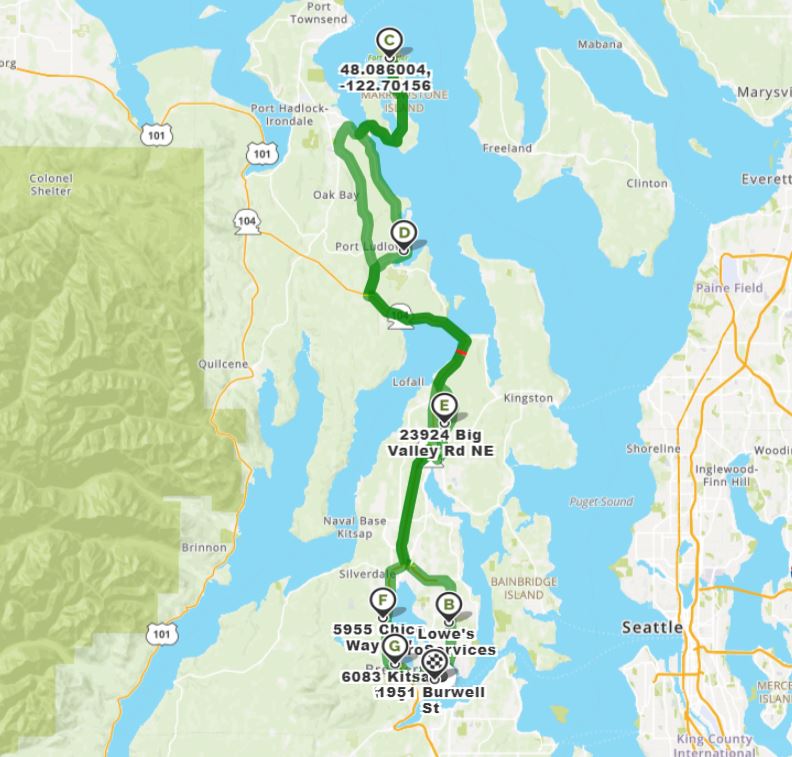
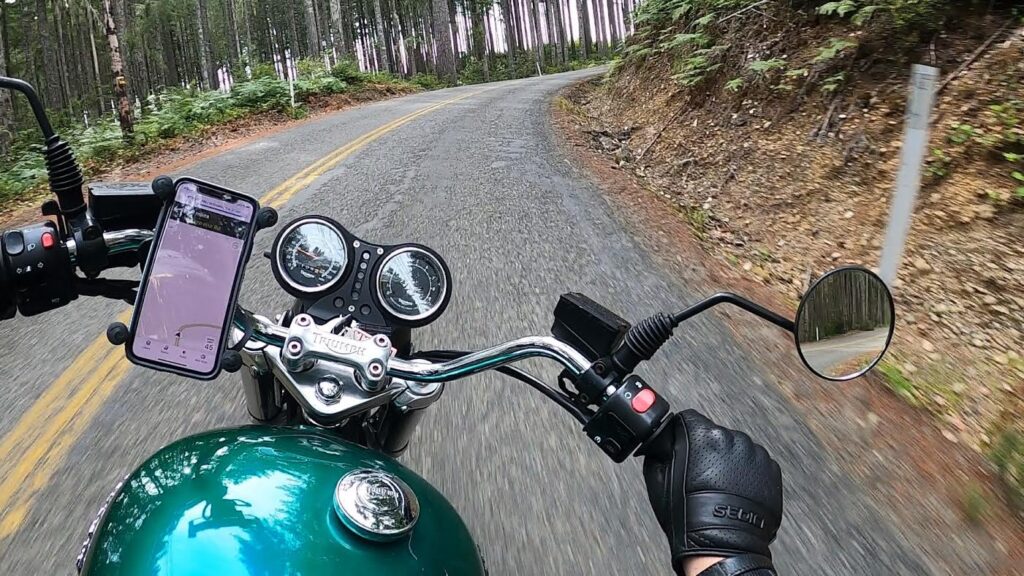
I was trying out a new map app, a problem with many of the most common apps is that when you reach a checkpoint on a plotted course you have to press a button to move the directions on to the next section of your chosen route. This typically involves pulling over and taking off a glove. What I hadn’t realized as I plotted our checkpoints is that I had not created smooth transitions. As we reached Tahuya and rumbled through the little town, suddenly my directions went blank and when it came back I was being told to turn around. Dan and I pulled over to investigate and that’s when I realized my problem. The directions as I had set them brought us all the way into the heart of Tahuya, but the turnoff for our next checkpoint was just over a mile behind us.  Knowing that this next section was the last part that was completely foreign to me, we headed back up the road to journey north to Holly with just a smattering of confidence that we wouldn’t get lost again.

The road is actually dry here despite how it may appear.

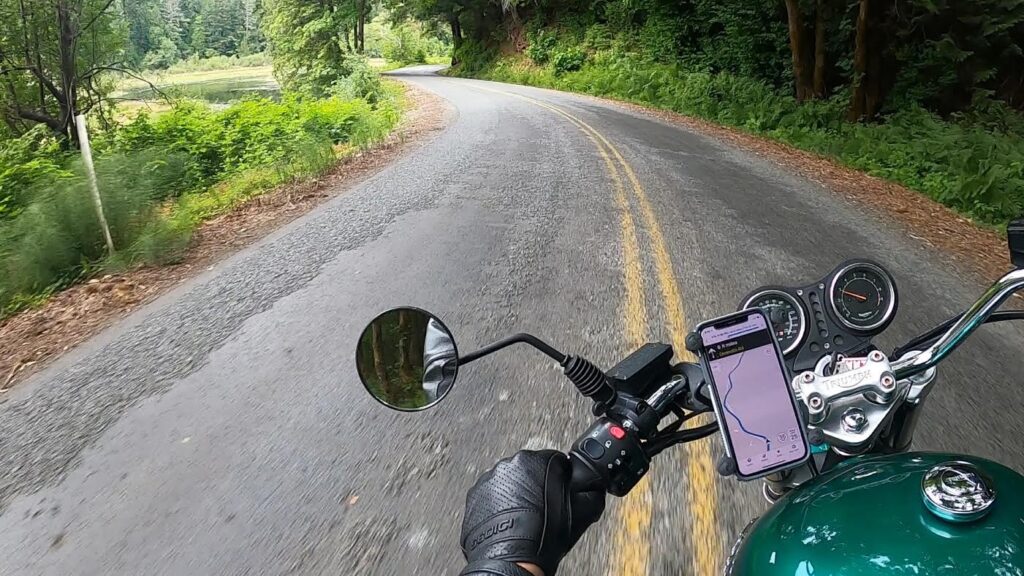
We had chosen NE North Shore Road on our way into Tahuya to enjoy the view of the water but from the taste we got of Belfair-Tahuya Road, and the way the rest looks on the map, it’s on my list to revisit in its entirety. This little peninsula jutting into the Hood Canal has a hill in the middle and we began to climb almost as soon as we turned off onto NE Belfair-Tahuya Road. This is an alternate inland loop from Belfair to Tahuya as the name may have suggested to you and we were only going to be seeing about a third of it before turning off on Dewatto Road. This section of road starts out with an uphill S turn before mellowing out into a lazy curved wooded road. We briefly got caught up behind a lost pickup truck but after a couple of “false alarm” turn off attempts the truck finally cleared the way for us just in time for us to turn off onto Dewatto Road. 

Another picture from a twisty turn? Sure why not.

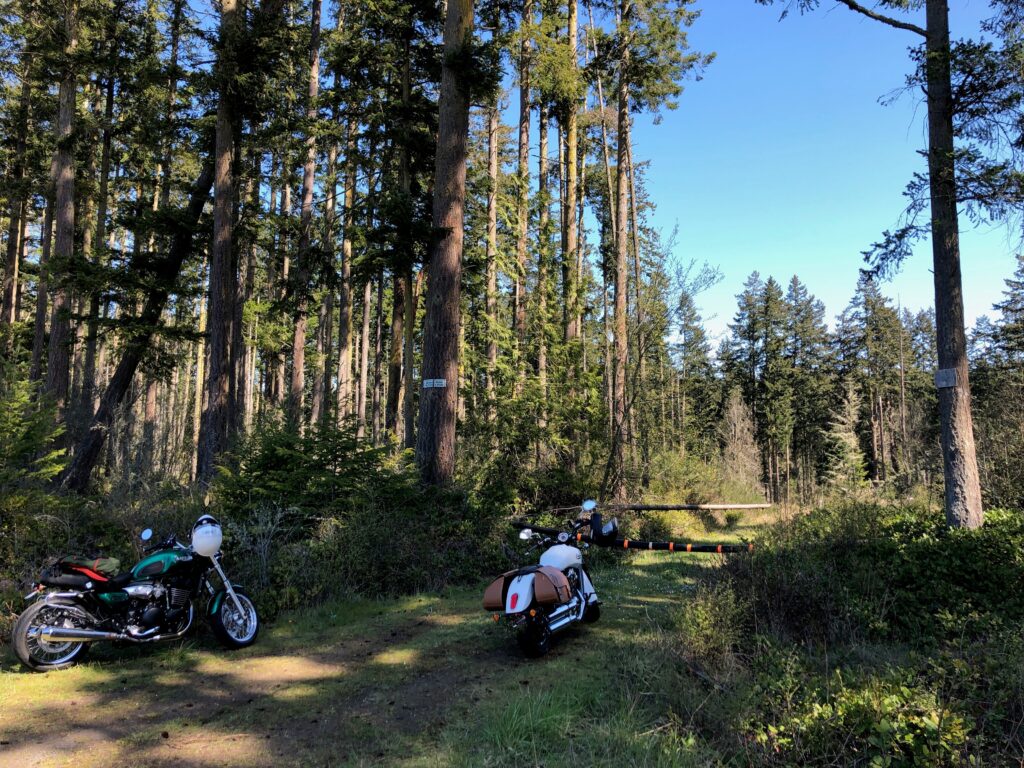
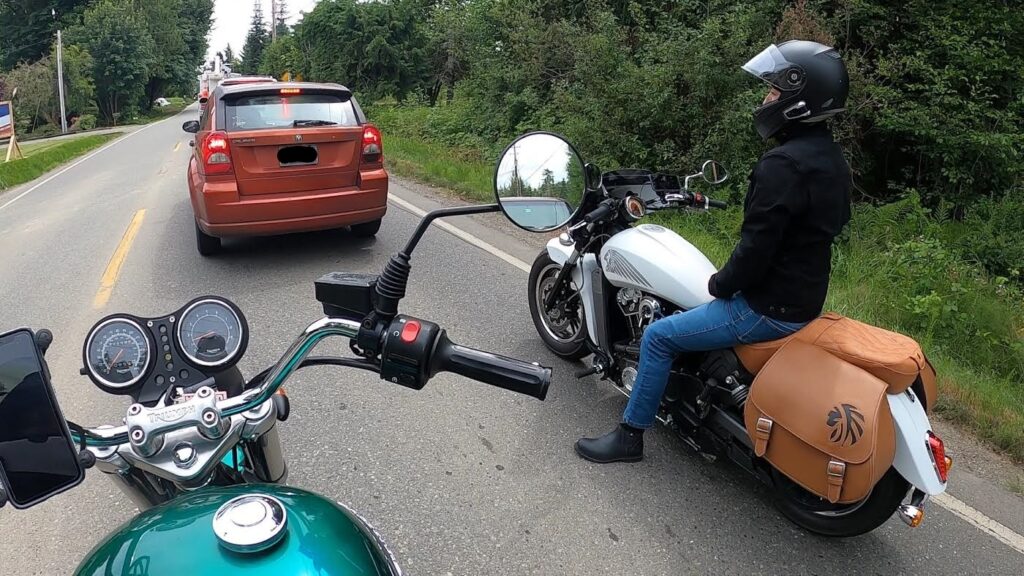
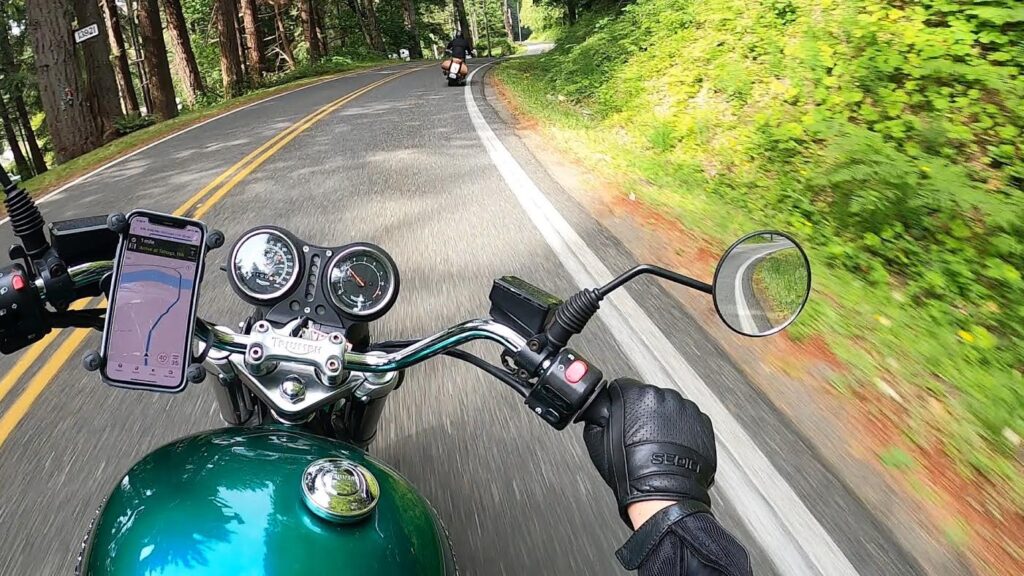
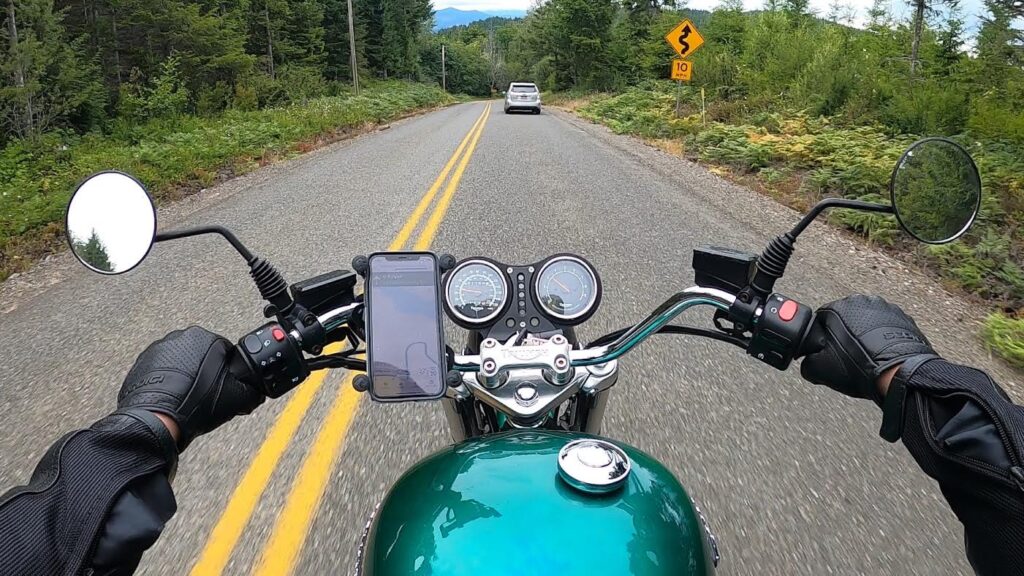
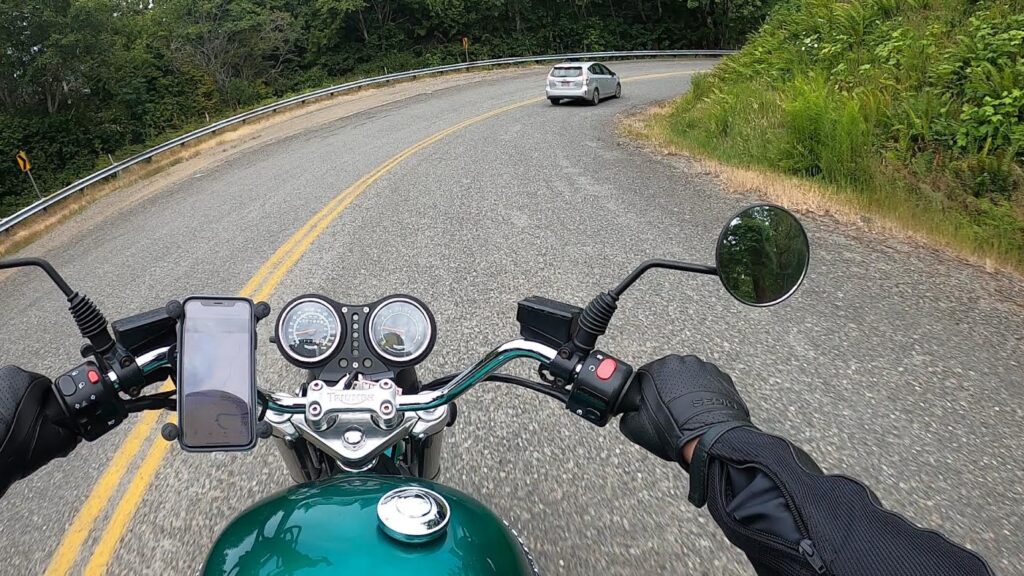
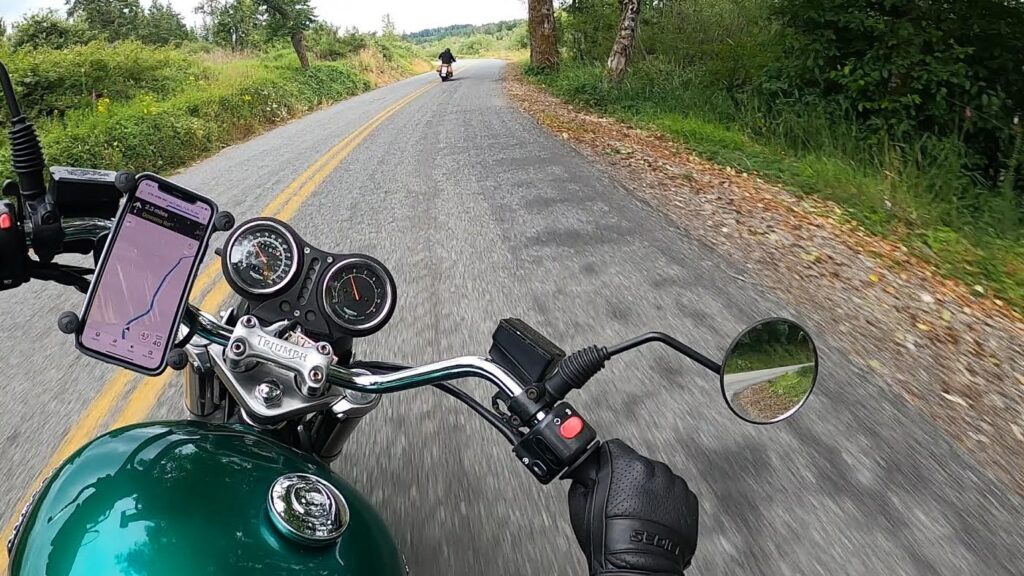
Dewatto is probably my favorite part of this ride. The road was deserted, the vistas were; at times, breathtaking. There are several tight technical turns and enough open stretches to let your heart rate normalize before diving into another section of twisties. We didn’t see a soul until all of a sudden someone in a hybrid pulled out in front of us traveling at a blistering, snail’s pace. Just as the frustration of riding 10 miles per hour under the speed limit was setting in, we saw the sign for a 10 mph turn ahead. This wasn’t just a turn, this was a tight hairpin S, downhill. This hybrid wasn’t here to torment us at all! This was a Guardian Hybrid sent to usher us safely through this gnarly switchback! We aren’t particularly reckless riders, we aren’t running around ripping up your neighborhoods and waking up your sleeping children, but everyone can miss a traffic sign from time to time and if we would have been traveling at the speed limit when we hit this section of road there really could have been trouble. Guardian Hybrid, thank you wherever you are. I personally like to think that this silver slug appears at this very corner in your time of need, to gently caress you down the hill before disappearing in a cloud of mist and glitter… but that’s just me. 

Not all angels have wings. Check out that sign, there’s some serious curves ahead.
I don’t know if this picture really conveys how steep this hill already is but trust me, it was steep.
Very steep and very slow.
And just like that our Guardian Hybrid was gone, gently signaling its turn as if to wave goodbye and Godspeed to us.

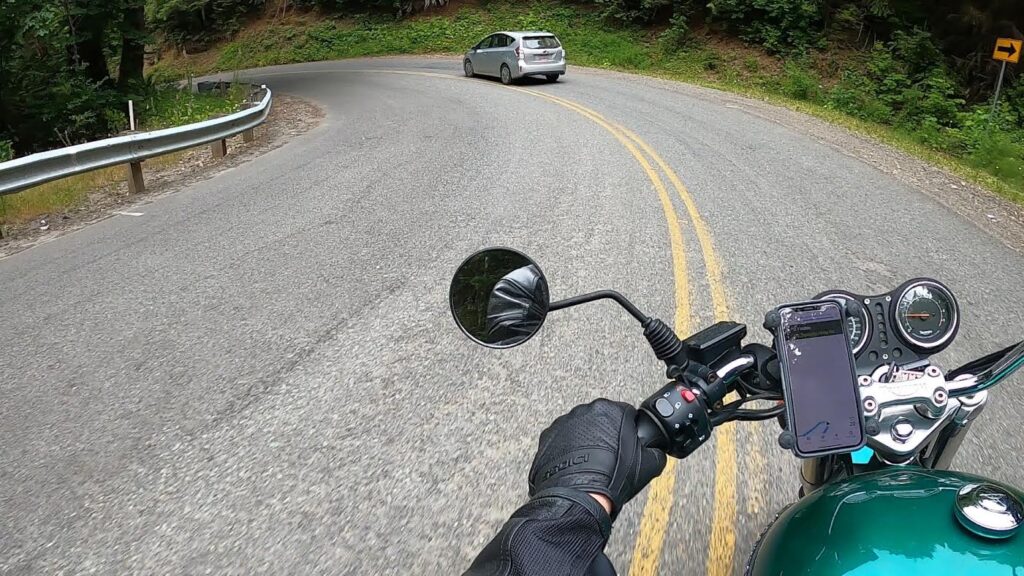
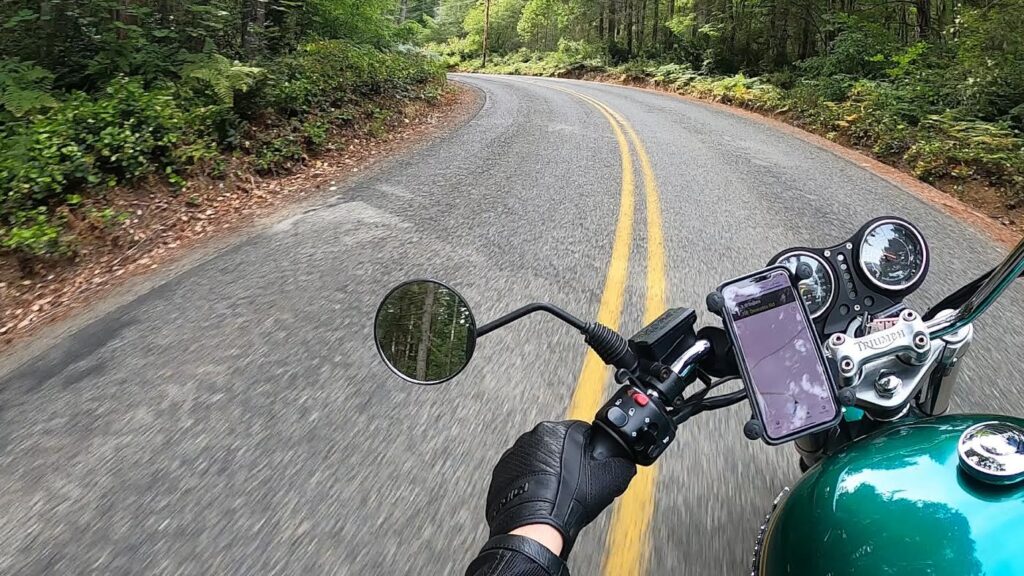
Shortly after the Guardian came to protect us we enjoyed another fun waterfront road and then there was a strange intersection. It almost looks like the road takes a 90 degree right hand turn while a new road shoots off ahead. If you veer to the right you actually are changing streets while staying straight on to the unmarked road is the continuation of Dewatto. Soak it up now because this is the last section of really technical riding. Once we leave Dewatto behind the road becomes much more open and sweeping. Rider beware, what you can’t see on a map is how tight and narrow some sections of this road are. It’s also fairly remote so ride within your own skill and stay frosty. Safety warnings aside, a superb riding experience will be had and words can’t do it justice so get out and experience it yourself! Dewatto terminates at a T intersection of the Holly-Seabeck Highway. Having learned from my mistake in Tahuya and being slightly more familiar with this road; I knew that we wanted to take a right at this junction rather than taking the left to continue into Holly. We pulled off the road at a nice wide spot to get some water and stretch our legs having tackled roughly 60% of the ride so far. The road continues to be lined mostly with trees and a few neighborhoods and small farms.

Check out that little section of map! Lazy twists to ease us back into things after the Guardian was called down to protect us.

Seabeck is a cool little town. Really it isn’t much more than a few blocks along the waterfront. Kids who grew up where Dan and I did, got to do a few nights at camp as 5th graders. There were a couple different camps that the schools sent kids to, but the one I went to was right here in Seabeck. The camp is closed to the public and it looks like there is some construction going on so there was no opportunity to stop and take a look around. From what I remember a lot of the cabins are old historic buildings and there is a cemetery behind the main camp back in the woods. Perfect for gaggles of 12 year olds right? Dan hadn’t gone to Camp Seabeck until high school as a camp counselor so we were able to reminisce somewhat in the rather brief time it takes you to traverse through the town. There is a small low bridge just on the other side of town that lots of people stop at. I have seen people with their cameras set up on tripods, some aimed out at the water while others were aimed up in the trees where there is an eagle’s nest. Today it’s warm and sunny and there appears to be a few cars loaded down with kids that are now swimming right off the side of the bridge itself.

The road here isn’t in great condition but it does lack any real obstructions to avoid.

We are now in what I would consider the home stretch. Our path is meandering and lazy, perfect for Dan and I to rehash all the fantastic twists and bends we rode in the past hour and a half. This section of our trip is 55 mph the whole way with some great long stretches of straight pavement. Less savory types may take these opportunities to give the throttle a little extra twist but certainly not us. Eventually we came to a roundabout(traffic circle to some). If you take the first exit you’ll end up at a charming little lake that I’m sure gets slammed with  people when the weather is right. We are taking the second exit though, and continue on straight towards Bremerton. There are a few more turns of note on this last little bit including a great big downhill left hand swooper followed shortly by another to the right but sadly we are now back in civilization and we have more and more vehicles to share the road with. 

Pretty much cornering heaven. When we got back to Bremerton, Dan and I realized we hadn’t really stopped to take any pictures or anything, it was a short ride and we were having too much fun to think of stopping.

This is one of those rides that makes you feel lucky to be near it. Knowing that, with an afternoon to kill, I can tackle those curves again is what my office desk daydreams are made of. From the amount of traffic we saw on those back roads I am pretty confident we found some hidden gems of the Olympic Peninsula. It’s afternoons like this that make the ferry trip from Seattle so worthwhile. 

Fort Flagler

Another cool but sunny day in mid April saw Dan and I heading north from my home base in Bremerton. This time our destination was Fort Flagler. Our major hurdle was going to be crossing the Hood Canal Bridge. This bridge had been on my “to-do” list for quite some time and was also a daunting prospect. Why? The bridge is primarily a grated surface. Grated surfaces are known to be tricky to two wheels depending on their design and especially the weather, but we will get there in a moment.

Our route took us up highway 303 before joining with WA SR-3 in Silverdale. From there we headed North taking 3 to the 104 junction. Now if you’re looking at the map and saying to yourself, “Whoa, that’s a lot of miles with really not much description!” Well you’re right and I find that part of the ride very boring so I don’t have much to say about it! Now that we are at the 104 we take a hard right at the traffic light to get onto the Hood Canal Bridge. Now as I mentioned above, this ride was pretty much designed to force us to take this bridge. Its not particularly daunting when you are in a car, its low to the water, its only 1 lane each way, not even a particularly long bridge, but that grated surface had me worried. So far in my time riding my motorcycle I hadn’t needed to ride a grated surface and the unknown is what scared me. As you pull onto the bridge the grating is in sections with solid concrete strips spaced for car tires and grates between so you can ride the concrete part of the way across. So far so good, as you get into the middle sections though, the grates now extend across the entire road surface. At this point, I bet you’re thinking it would be a great time to take your Chevy Tracker and illegally cross into oncoming traffic to pass some guys on their motorcycles. Well apparently you wouldn’t be alone in that thinking because that’s exactly what happened! Dan and I absolutely couldn’t believe our eyes as this little old lady in her Tracker deciding that the 2 lane bridge was a good place to pass. You know those times you just see something so asinine that you aren’t even sure you’re seeing what you’re seeing? Like the time in college when it was warrant serving day and I got off my lunch break to head back to work and there were police, guns drawn, in my front yard. Now they were faced away from me and pointed across the intersection at the neighbors but still, not what you expect when you walk out of your front door on a spring afternoon! For those of you who don’t know what a Chevy Tracker is, go ahead and open a new tab and give it a google. You need to really immerse yourself in the stupidity to understand our bafflement. Moments after she completed passing us and pulled in front of Dan, she decided to pass the next 2 cars in front of her at the same time. Again, this is not an extremely long bridge, this old lady just had zero F’s to give any of her fellow motorists! The 2 cars she passed in front of Dan took the next turnoff after the bridge, but we were fortunate enough to follow this woman for a few more miles before taking a right onto Beaver Valley Road. She didn’t seem to be in that big of a hurry. Obviously she was in too much of a hurry to follow the speed limit over the bridge but we had no trouble keeping up and obeying the law once we got over. Little old Chevy Tracker lady if you are out there. I hope you made it safely to wherever you were going. Then I hope your family took away your keys and will never give them back. Beaver Valley Road is a sweet little road, it follows along a little creek and just kind of meanders through a valley on your way to become highway 19. Once we made Chimacum we left 19 and took Chimacum Road just a few miles to highway 116. On 116 we headed east and were able to catch some glimpses of Port Townsend Bay. The bridge onto Indian Island is a tiny thing but it offers you a couple seconds of Port Townsend Bay to the North and Oak Bay to the south. 116 looks to be the only portion of Indian Island available to the public as the rest is a Naval Magazine. Right now getting off Indian Island is a small delay. The bridge is under construction and it is a single lane crossing with a temporary traffic light on either side. The delay is minor and we only had to wait a couple minutes each way, maybe slightly longer than your average traffic light. 116 now turns north through Nordland and you can enjoy a fairly straight shot all the way up to Fort Flagler State Park. Unfortunately for us, at this point in time the park was closed and there were a dozen day trippers parked at the gate where we planned on taking a short water break before heading back. We found a small turnoff into someones empty wooded property just a couple hundred yards back down the road that we were able to take advantage of instead.

Peaceful place to turn around near Fort Flagler

After downing some water and conferring on our route home we were back on the road. This time just after Indian Island we took a left and headed south down Oak Bay Road. This is a fun little road that affords you plenty of opportunities to take in the bay itself. Dropping us down through Port Ludlow we eventually came to 104 right next to the Hood Canal Bridge. This time we made it through without any crazy people, taking a yielding right on the other end of the bridge to continue back south towards home. We exited onto Big Valley Road and took that into Pouslbo where we rejoined highway 3. We managed to escape 3 again when we exited onto NW Newberry Hill Rd, went under the overpass and exited the roundabout south onto Chico Way. Chico is a pretty straight shot down into Bremerton and isn’t a exceptionally twisty or fun, but it is better than riding a boring highway 3 all the way home! We had done it! We conquered the Hood Canal Bridge and I will say, this wasn’t the most beautiful ride, it wasn’t the most exhilarating, but defeating the bridge was an achievement. We are now set on circumnavigating the entire hood canal which will hopefully bring us some more fun along 101. The northern portion above Hama Hama looks pretty twisty and we will have to get creative to find some fun roads to take and avoid the highway 3 monotony.

Beautiful Day to ride up to Fort Flagler

Helmets

A couple things to address before we talk specific helmets. First, I personally have made the decision to only ride with full faced helmets. As the strength and durability of modular helmets continues to increase I may someday be interested in those but for now; I’m trying to protect my dome, so its full faced helmets for me. The next item is safety ratings. There are several safety ratings to go by and I’m a real believer in the Economic Commission for Europe(ECE) certification. There are a million blogs, articles and videos about the different certifications but to condense them all into my personal beliefs; DOT is crap, ECE provides more realistic real world standards, Snell is for the track and SHARP just hasn’t tested enough yet(but they are working on it). Please do the research and decide for yourself what is best for you.

Helmet: BiLT Blaze 451-Size XL Purchase Price $89.99(Currently $79.99)

BiLt Blaze 451

Full disclosure, I purchased this helmet because I couldn’t wait for the helmet I had ordered to arrive. I went into one of the big chain stores and asked for the cheapest ECE certified helmet they had in stock in my size.

Initial Impressions: Inside the box you get a fully assembled helmet with a storage bag and a breath guard. The build quality appears to be good. Its a Polycarbonate shell and weighs about 3 1/2 pounds. The liner is soft to the touch and the foam almost seems a little too spongy. There are 2 passive vents in the rear, a chin vent and a forehead vent. The face shield opens to 4 different positions. Mine is the black and gunmetal color combo and overall impressions are not bad. Quite impressed given the price.

Riding Impressions: This is a pretty comfortable helmet. I have kind of big ears that tend to get pinched and folded but I’m able to get this on comfortably. It’s not a quiet helmet though. Tons of wind noise but it makes talking to people easier. The chin strap is set a little far back for my liking and rests just above my Adams apple on my neck making it a little uncomfortable on my throat. Visibility is good and the edges of the helmet are just barely visible in my peripheral vision. The face shield is not great. I’m not sure about the entire product line but for this particular face shield there is a little distortion and some waves. Nothing I would consider dangerous but definitely noticeable. I’m a big guy, I run hot. This helmet does not help at all with that. The vent system just isn’t robust enough to keep the air flowing in sufficient quantities.

Pros:

  • Cheap price for lots of protection. ECE rated for under $100 is fantastic protection for a bargain.
  • Decently comfortable. The fabric and foam are nice and soft. I don’t feel like its squishing my face when I put it on.
  • Face Shield has indents for 4 open positions and operates smoothly.

Cons:

  • Loud – Makes having a conversation easier but wind noise is pretty terrible.
  • Hot – If you are a cold person, this might be a pro for you.
  • Interior comfort foam feels a bit thin and while I haven’t had to utilize the protection of this lid, I feel like a small knock would really translate through that thin comfort foam.
  • Face Shield optic quality is sub par.

Final Thoughts: I know it seems like I’m not very excited about his helmet but nearly all the problems I have I could live with. If you are on a tight budget and want to get the most protection you can, I don’t think you can go wrong with this helmet. Yes its loud, wear ear plugs. Yes the face shield isn’t great, but you can live with it or replace it for around $20 dollars. Yes the interior comfort foam could be better but you can rest assured that the safety is there. Bottom line is I would absolutely buy this helmet again and I will continue to store this helmet as a backup if I ever need it. I have already let a friend borrow it to use on a test ride.

Helmet: Shoei RF-1200 Size XL Purchase Price $485.99

Shoei RF-1200

Initial Impressions: Inside the box you get a fully assembled helmet, a storage bag, a breath guard, a chin curtain and a pinlock shield. You also get a little bottle of oil for the face shield gasket. As you would expect from one of the top helmet manufacturers, the build quality is impeccable. The RF-1200 is constructed from fiberglass and weighs in around 3 1/2 pounds. It took me a while to install the pinlock but having ridden without one, its so nice to not worry about fogging up. Multiple vents, in the rear the vents are adjustable. There are 3 vents on the forehead and a chin vent. The interior comfort foam is covered in a slightly stiff fabric, I’m sure that will break in and the foam itself feels robust. The neck roll ring has the red tabs for emergency personnel and I personally hope they are never used but its nice to have them there. I got the white. I wanted something sort of high visibility without going with a true hi-viz color like the neon yellow. The face shield opens to like 8 different positions including a tiny crack opening that is great for city riding and letting some extra air in. The RF-1200 is Snell 2015 and ECE certified.

Riding Impressions: This helmet is definitely quieter than the BiLT helmet but its still pretty loud. I instantly notice that off the bike just trying to talk to my wife with it on, its much more difficult to hear her. The wind noise when you get going isn’t horrible but there is quite a bit of it. The biggest thing is the air! Man this helmet moves a ton of air and that is fantastic. Its a full faced helmet, I get it, I’m going to get hot, but when I’m moving down a country road this lid is comfortable even on the hottest PNW summer days. Visibility is fantastic, the edges of the helmet are just visible in my periphery. The face shield itself is crystal clear and that may be one of the biggest noticeable differences between this and my bargain helmet. The chin strap fits right where I want it to and is very comfortable all around. I will say that I do get a little bit of smooshy face from the cheek pads but I’m ok with that.

Pros:

  • DOT, ECE and Snell 2015 certified.
  • Face Shield crystal clear and opens to so many different positions.
  • Gobs of air flow. On colder days I actually have a hard time finding a vent combo that allows just a little airflow in without being too chilly.
  • Comfort foam really hugs your head and makes your feel like you’re wearing a substantial piece of protective equipment.

Cons:

  • Not exactly budget friendly, despite this model being several years old now the price is staying steady.
  • Replacement parts are really expensive. For example a new Shoei face shield is over $60 dollars.
  • Too much air flow for cold days. I wish the vents had indentations so that you could feel how open or closed they were while on the move especially the chin vent.

Final Thoughts: Ok, so my cons list is a little flaccid. The truth is, I love this helmet and am extremely pleased with my decision to buy it. Its comfortable, its not horribly loud, it moves tons of air. I do wear ear plugs pretty frequently while I ride anyway and I have since changed out the clear face shield for a tinted and mirrored version. I need to buy another pinlock to go with that face shield but that is for another review. I like the white, my friend has since bought the RF-1200 in flat black and it also looks great. Riding around here you see a vast majority of helmets in black though and not many in white, hopefully that means I stand out a little more to other drivers. There are a ton of helmets out there that are cheaper than this one that offer similar levels of protection but for my $500 dollars this is the one for me. I feel confident in the safety of this helmet and the bottom line is that I would absolutely buy it again.

Regular Maintenance

2001 Triumph Legend: Photo taken on the day we met at the dealership

To get started lets talk about the condition I found my bike in. Its used, at the time it was 18 years old, and it hadn’t been ridden all that much. It had 18 thousand miles on the odometer and the story from the dealer was that I would be it’s 3rd owner. A long time customer of their’s had traded it in a couple years after buying it from the original owner who had stopped riding it years before that. You could say it was almost a bit of a barn find for that second owner. Aesthetically I would give the overall appearance; considering its age, a B-. The front fender had(and still does) a gnarly scratch from where it was dropped in a stationary position. The 2nd owner was moving it in the garage and tipped it over against the garage door track, resulting in a long, wide, scratch on the top of the front fender. This also broke the stalk of the front right turn signal which they remedied with some type of putty. There are a couple small dimples in the gas tank and a little scratching there too. Nothing you wouldn’t expect from a motorcycle old enough to vote! The chrome on the silencers was starting to bubble and peal in places. The whole bike needed to be cleaned really well, chrome polished, etc. Bottom line, most all the aesthetic issues were unnoticeable from just a few feet away with the exception of the front fender. Mechanically; also considering its age, an A-. The carburetors clearly were out of sync so it’s idle was a little chunky, but that seemed to be its only real issue. So far the work I haven’t done myself is a thorough once over from a local mechanic who also synced the carburetors and changed the oil.

Items that I have taken care of myself are pretty basic. I check and fill the air in my tires pretty much weekly and I clean and lubricate my chain every 300-500 miles even when it doesn’t look like it needs it. Before putting it away for the winter I put some fuel stabilizer in the tank and installed the leads for a battery tender, quick connect plug, which makes it really fast and simple to hook up. I will put the battery tender on pretty much any time I don’t think I’ll have the opportunity to ride for a couple weeks. The chain lube and cleaner I use is the Maxima brand “Ultimate Chain Care Aerosol Combo Kit” you can find online. It comes with a can of cleaner, penetrating lubricant and chain wax. I also use them in that order. Along with the cleaner I typically employ a piece of cardboard to catch any drips, a couple of clean rags and a chain brush. I bought a cheepo from that same online retailer that has a straight brush on one end with long bristles and a “C” shaped end with shorter bristles that fits over the chain. I also have a rear paddock stand so that I can remain stationary while doing this since space is a concern at my house. If you have a nice open driveway you can just move your bike around to rotate your chain but that sounds messy and who wants to do that if they don’t have to? Do you need to use wax and lube on your chain? Everything I’ve read says either or, but I like to add the wax over the lube because I think the wax offers a little more resiliency to moisture and I haven’t seen anything that says that using both in tandem will harm anything. There are a ton of forum posts, videos, blogs etc. all about how to clean and lubricate your chain and there are also a million products out there. And like most other things you will see about a million and one different opinions on methods, what products to use, why you’re an idiot for using the one you chose etc. The bottom line is its your chain, lube it how you want to. Whatever you are doing is probably better than doing nothing at all.

Tail Tidy & Turn Signals

My wife gave a tail tidy kit to me for Christmas. She may or may not have received several links to it in the months ahead of time, but I wanted to clean up the rear end of my bike and lose the massive stock turn signals. I got mine from https://www.maundspeed.com/. Its the Ford replica tail light. There are several kits available at different price points but the one I got came with the under the seat pan, front and rear turn signals(in black), the taillight already installed on the bracket that also holds your license plate. Taking off the stock parts was pretty fun and simple. After pulling the seat off you just kind of “go nuts” unbolting things, the only real hiccup was the front of the stock rear fender. It is riveted to a plastic skirt that covers the rest of front side of the wheel well. I had to drill out those rivets and then used the existing holes that lined up with the Maund under seat pan and ran a couple machine head screws from the underneath so that the smooth bolt head would be towards the tire. When cutting the wires to the original brake light and turn signals I left myself a little length just in case I, or someone else, ever wanted to install those again. I plan on hanging on to them, maybe they will adorn the walls of my workspace but you never know if you might part with something down the road so I wanted to keep them serviceable. Pulling the rear fender and turn signals + brackets off instantly gave me a rush. I was going to be saving so much weight on the rear end of this bike and giving it an instant “Brat” type vibe. I left the luggage racks on because those come in handy sometimes which does deflate the vibe a little but so does having saddle bags on at all. Look, I’m not bashing your bags, I just prefer the look of my bike without them so I only throw mine on when I know I need the luggage. The luggage racks lower mounting point is also where the passenger pegs and the exhaust hanger goes so pulling the racks on and off when I want to have the luggage just isn’t very practical.

Look at all that empty! The rear end of my motorcycle after pulling off the seat, rear turn signal assemblies, and rear fender/brake light.

The Maund kit is pretty much bolt on from there. The main bracket housing the taillight also has a mounting point on each side for the turn signals. When switching from stock lighting to LED’s there are a few concerns you may have to address especially on older bikes. The major one is that you’ll now have more power feeding through your system because the LED’s use much less to operate. This may give you a few gremlins to hunt down. The first issue I had was that the brake light was on constantly no matter if I had the brakes engaged or not. Turns out that wiring the taillight correctly can solve that. I’m now feeling extra smug about my superior wiring skills. Then I wired up the turn signals. These I actually did correctly on the first attempt but when I flipped the turn signal switch both signals flashed together and very rapidly. This actually was a power flow issue, there just wasn’t enough resistance. Fortunately after some internet searching and a bit of agonizing about wiring inline resistors, I found a simple fix that wasn’t cost prohibitive to try. I replaced my turn signal relay switch with one that is designed for LED turn signals. The one I got also has a little dial on the side so I can adjust how rapidly my signals blink. Is that important to have? Not at all, but it was available and I thought it was neat and it only set me back 9 dollars.

Quite a size difference! The new turn signals(left) vs. the stock originals(right). Despite being much smaller, the new signals are way brighter.

Now that I had the rear end wired and working I thought it would be a simple deal to wire up the front turn signals. The factory headlight mount is also the mounting point for the turn signals. Its a roughly triangle shaped piece of chromed metal with a hole drilled in the center for the signals to attach to. Unfortunately it was at this point that I realized that the original turn signal wasn’t broken and fixed with putty, it was the headlight bracket itself. When the bike was dropped by the previous owner, the turn signal was so tough that it punched through the bracket leaving a much bigger and jagged hole. Getting a replacement turned into a small ordeal as the first one shipped to me was rusting, the chrome was scarred and certainly didn’t look like the advertised “new old stock” condition for the part I paid for. This looked like a used part that was only in slightly better condition than the one I was replacing. Fortunately after sending a few pictures that I took the moment I opened the package and emailing the company right away, they had a replacement out to me in a reasonable amount of time. The second one still isn’t perfect but I was content to buff and polish it to a 98% new state rather than wait for a third replacement and it was in much better condition than the first replacement. The company has a ton of parts in their online catalog and isn’t one of the big motorcycle parts and accessories sites that we all know and love. I’m not going to post who they are because they were very responsive when I contacted them and they did try to make it right. I’m also not going to give them any free advertising because the second replacement bracket was supposed to have been inspected before shipping and that clearly didn’t happen.

In the foreground is the old bracket with its gnarly broken turn signal mounting point. In the background is the shiny new bracket. In the reflection of the chrome is my ugly mug making an ugly mug.

Now that I had all the parts I needed I could pull the headlight out of the casing and get to work. I had already wired the rear turn signals successfully so I was confident that the front turn signals would go in quickly. For the most part they did. The rats nest of wiring held in the headlight housing is a bit of a pain to navigate. I was also using heat shrink electrical connectors to ward off any moisture and that was more difficult with all those wires packed in there but I managed. I tasted sweet victory. Wiring of any type has always been a nemesis of mine. I don’t like doing it. Its delicate work that is easy to mess up and you can only hope that your fuse box catches the problem before you fry a part, or some wiring burns up. Plus you have to cut wires, strip wires, splice or connect wires, all the while using up just a little bit of the extra length each time and sometimes you don’t have a lot of extra left; especially on older things that may have been modified or replaced multiple times in their lives. A total rewiring is just not in my wheel house.

It might not look like that much wiring but remember a headlight still has to go in there on top of it all and it seems like there is a very particular way it all fits.

It was a fantastic winter project that got me feeling closer to my machine than I did last year. I now have a deeper sense of pride in my bike because I did the work myself and its a big noticeable change to the aesthetic. Going down to the basement after a long day of work to turn a wrench was so gratifying. Having run into a few gremlins in the process I feel like my understanding of those wiring systems has grown as well, and I won’t be as daunted if I get to do something like that again. Plus if you work behind a desk like I do, anything to get your hands dirty and accomplish a real tangible thing just feels great. “Hey Guys! Check out this sick spreadsheet I created! You like that table? Wait till you see the chart that goes with it.” That’s boring isn’t it? “Hey Guys! Check out this sick tail tidy, You like those new turn signals? They look so much cleaner than the stock originals.” That’s much more engaging!

How cool is that?

South Side Hood Canal

Hama Hama Oyster Co.

Back in April, Dan and I decided to take a cold sunny day to head around to the other side of the Hood Canal. Dan came over to Bremerton in the morning on the ferry from Seattle. While the Seattle side of the ferry terminal is still going to be under construction for the next couple years, the ferry ride is still worth the trouble. On a clear day, you can enjoy some beautiful views of of Mt. Rainier, West Seattle, Rich Passage, and the water itself. You may get to see some seals or even Orca whales. My wife, Heather made us brunch before seeing us off on our mini adventure. Dan had made this journey by car once before. I had never been to this section of the Hood Canal. From Bremerton we headed down Highway 3 to Gorst where we exited on W Belfair Valley Road. Somewhere around the Bear Creek Country Store, this road becomes NE Old Belfair Highway. While there are some spots where the speed limit drops, you’ll enjoy mostly country road speed and sweeping bends. Once we made it into the city of Belfair proper, we reconnected with Highway 3 towards Shelton. Just a couple miles down the road you’ll come to the junction where Highway 106 branches off to the right.

A brief summary of Western Washington’s natural beauty all in one photo.

Highway 106 is where the fun is turned up a notch. What a great stretch of state highway! You’ll carve your way along the southeastern leg of the Hood Canal past scenic views of the Olympic Mountains and waterfront vistas. Highway 106 takes you all the way to the Southwest corner of the Hood Canal before depositing you on to Highway 101 North. 101 will not be outdone by 106 when it comes to curvy good times. The section of road between Hoodsport and Lilliwaup is full of twists and turns culminating in a long swooping right that brings you all the way around a little cove. Does this cove have a name? Probably. As of writing this, do I know it? Nope. Is it labeled on the map I’m also looking at right now? That’s also a nope. It’s safe to say that you’ll know it when you see it.

From here the road mellows a bit, we are in the home stretch to Hama Hama Oyster Saloon. What a cool place! During this time of social distancing and quarantine, there isn’t much happening. They are still open to purchase oysters by the dozen but if you were hoping to enjoy a beverage, the fire pit and the views of Hood Canal, you’ll have to wait till things get back to normal. You can still climb the mounds of oyster shells if you are so inclined and there is plenty of scenery to marvel at. Despite being short on amenities at the moment, this place is doing a vigorous business. Customers can line up at pre-marked positions to make their purchases. Dan is a big oyster enthusiast so he purchased a couple dozen on ice and thrown in his pack. I brought home a dozen for Heather. Hama Hama lays nearly straight due West from our starting point in Bremerton so we now had the choice of turning South and heading back the way we came, or continuing our trip North to circumnavigate Hood Canal. The road map North through Brinnon and Quilcene does look enticing, but those curves we came through are already calling my name and we decide backtrack way we came.

A pile of oyster shells! In the background you get a glimpse of a cleaning apparatus. The conveyor belt runs the oysters into the high side of the spinning cylinder. As they make their way to the bottom sand, muck, and other waste product get knocked off the oysters and fall through the grates leaving a much more appealing product for sale.

We made a brief pit stop in Hoodsport at the HCO(Hood Canal Outfitters) gas station to refuel and grab a six pack for the end of our journey. You know, some roads are just better going one direction over the other. This isn’t one of them. Before I knew what had happened we were back exiting the 106 and rejoining Highway 3 North East to Bremerton. The day’s adventure had put a big smile on both of our faces, the only thing left to do was to get home, crack open a couple of those beverages and rehash every corner, every curve, every vista we had enjoyed that day. 101 and 106 are well known in this area and get quite busy as the weather warms up. Even in the chill of a Washington spring day, we saw a multitude of riders. I can only imagine how many of us will be out there as the temperatures start to rise.

https://mapquest.com/directions/from/us/wa/bremerton-282039842/to/us/washington/gold-mountain-golf-club-304413382/to/us/wa/union/to/us/washington/hama-hama-oyster-saloon-304319491

It all started when…

Motorcycles have always intrigued me but they were always a pipe dream, just out of reach. My Dad had motorcycles back in the 60’s and 70’s. Him and his buddies would fly around the logging roads of Quilcene astride Trail 90’s and other little 2 stroke bikes exploring the forest around them for as long as the light or the gas held out. He had an affinity for British bikes and bought BSAs and Triumphs but sold his last one shortly after starting his family. Growing up in rural Western Washington, I knew a lot of kids who had dirt bikes but my mom being the worrier she is(Hi Mom! Look no hands!) never would allow any of us kids the freedom of a motor and 2 wheels. It wasn’t until high school that my older brother, serving in the Army, bought a bike. It was brand new, a Honda Shadow. The stock exhaust note left a lot to be desired but to me, it was incredible. I couldn’t believe he had done it, he bought a motorcycle despite our Mom’s furious protests! It finally dawned on me, adults with the means to do so can defy their mothers and ride motorcycles. Suddenly that pipe dream didn’t seem so far fetched.

My friend Pete already had a bike, Tony had sold his a few years back and missed it dearly and Dan had last ridden a decade ago but wanted to get back in. It was the winter of 2019 and I asked my wife one day if she would mind if I went and signed up for a motorcycle safety course. Her only stipulation was that she got to take it too. She now admits that a small part of her was hoping that my worrying nature(thanks Mom!) would override my desire once I knew that she was going to be out there with me. We got signed up and I have to admit I was the guy in the class that had researched, read, watched online videos and studied for this thing like it was my job. Fortunately there was already a couple of “Know it all” types in our class so that saved my wife the embarrassment of sitting next to the teachers pet. Our class had a huge failure rate, nearly fifty percent! One know it all, a young kid, didn’t show up for day two after getting reprimanded for not listening on day one. A couple ladies dumped their bikes during drills and one guy crashed during the straight line stop test. My poor wife tipped over during the ninety degree right turn from a stop. From inside my helmet a couple positions behind her waiting for my turn I hear this young girls voice from behind me, “Your wife’s a bitch!” Excuse me? “That right’s a bitch!” Oh yeah, it sure is high school girl. It sure is.

Fast forward a few weeks and the sun is shining and that new motorcycle endorsement is burning a hole in my pocket. I’ve been looking online for weeks, maybe even months at this point and I’m going back and forth between two schools of thought, new or used? New would be great, get exactly what I want, no one has abused it yet, factory warranty, dealer support but also a high price tag and am I really confident I won’t at least tip it over a time or two? Used has its own set of pro’s, way cheaper, maybe get some nice upgrades someone already took care of for me, and if there’s already a ding or scratch when I knock it over in my driveway, then maybe I won’t notice the new ones as much right? I still hadn’t decided for certain when I came across my bike online at a car dealership in Tacoma. It didn’t matter that it wasn’t the right Triumph, it was A Triumph. It didn’t matter that it was older than I wanted, it had less than 1,000 miles a year put on it. Its my favorite color and its within my budget. I took my little utility trailer and picked it up the next weekend. Listen, I live on the west side of the Puget Sound. My first ride on this new to me, used bike, was not going to include the Tacoma Narrows Bridge.

I just renewed my tabs for the first time. This first year has flown by. I’m starting this blog because I know my wife is tired of hearing me talk about my bike, my rides, where I want to go next. She’s gotten used to hearing “Motorcycle Stuff” whenever she asks what I’m looking at on my phone, what I’m texting about with Pete, Tony or Dan. She, by the way, decided that she doesn’t want a bike of her own. She took the class to see if it was really something she wanted to do. She’s glad she did it, she feels more comfortable with me doing it, and more comfortable being a passenger with that understanding of what I’m doing in front of her.

Stop by again soon. I have some rides to write up and much more in the tank for this season. If you have some ideas of your own on places I should go, roads I need to take or any other suggestions let me know by dropping a comment.